When the lifts open in Livigno: 2026/27 season
Lifts run from 28 November 2026 to 2 May 2027: season dates, ski pass price periods and what to expect at the start and end of winter.
Read more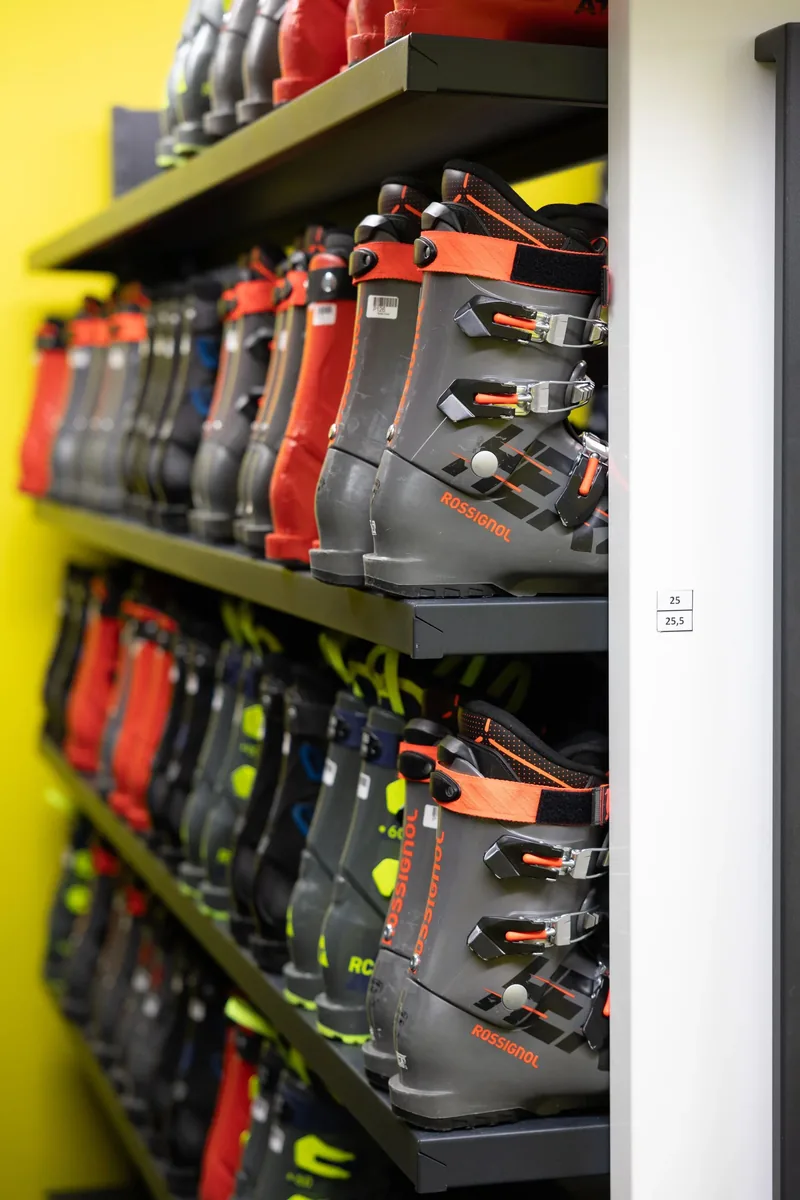
Stories & guides · Alpine skiing
Mondopoint sizing, foot length, flex and trying them on in the shop: the 5 steps to finding the right boot.
Does this one fit? It seems to. No, wait, it is too big, my toes touch the front. Choosing ski boots can look complicated, but a few rules are enough to get it right. Here we explain the Mondopoint system, how to measure your foot, what flex means, how to try boots on and which model to choose.
Let us start with a myth you hear all over the world: that a ski boot should be one or two sizes bigger than your shoe size. If it works now and then, that is a coincidence. You cannot compare shoe sizes with boot sizes, and shoe brands do not even agree with each other: a 40 from one brand is not necessarily a 40 from another. There are eight sizing scales in the world, and some treat men, women and children separately.
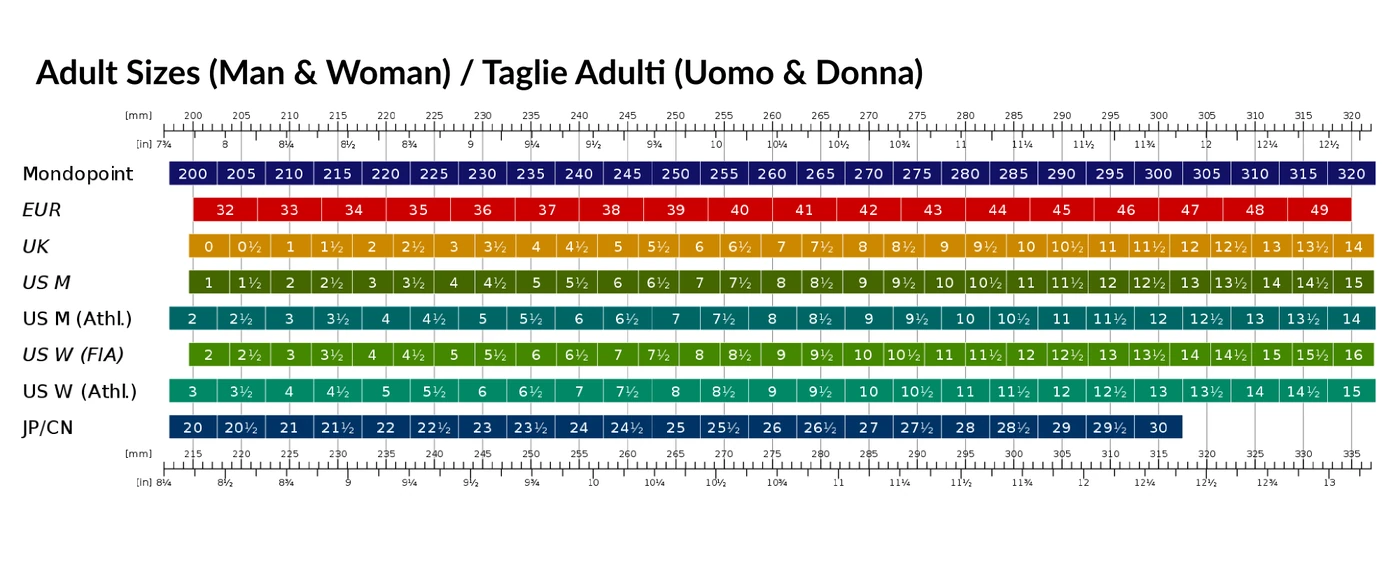
Boot sizes are based on the Mondopoint system, created in 1991 to give a single standard. It uses the millimetre as its unit: if you know the length of your foot, you know your size. The table below compares the sizes.
Specialist shops have a tool called a pedimeter that measures the length and width of your foot. With these two values you choose a shell that is neither too long nor too short, neither too wide nor too narrow.
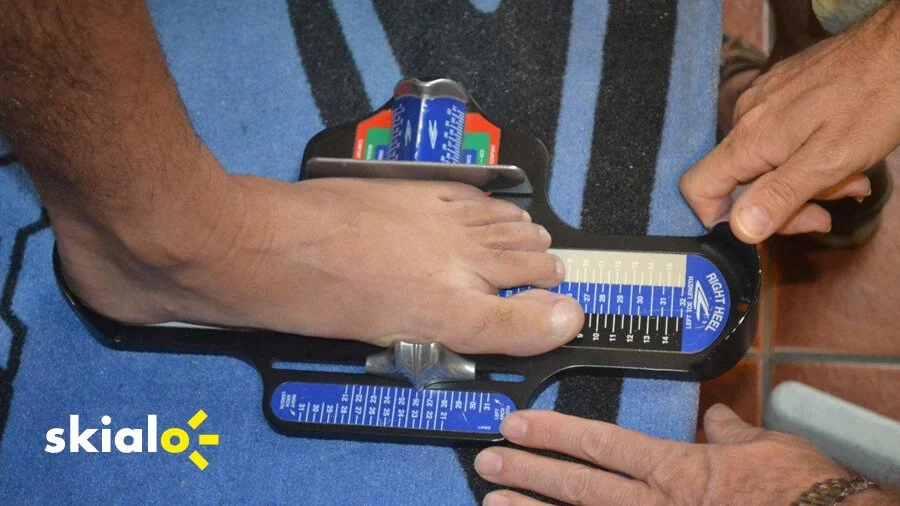
The volume of your ankles and calves counts too. A very high instep struggles to get into the boot, which is why some models have an easier fit. If you have large calves you can choose a wider cuff or extendable buckles, which give more room for adjustment.
Every manufacturer states how stiff a boot is with a number, the flex: the higher it is, the stiffer the shell. As a general guide, 60 to 80 suits beginners and intermediates, 90 to 110 advanced skiers, and 120 to 150 athletes or very strong skiers.
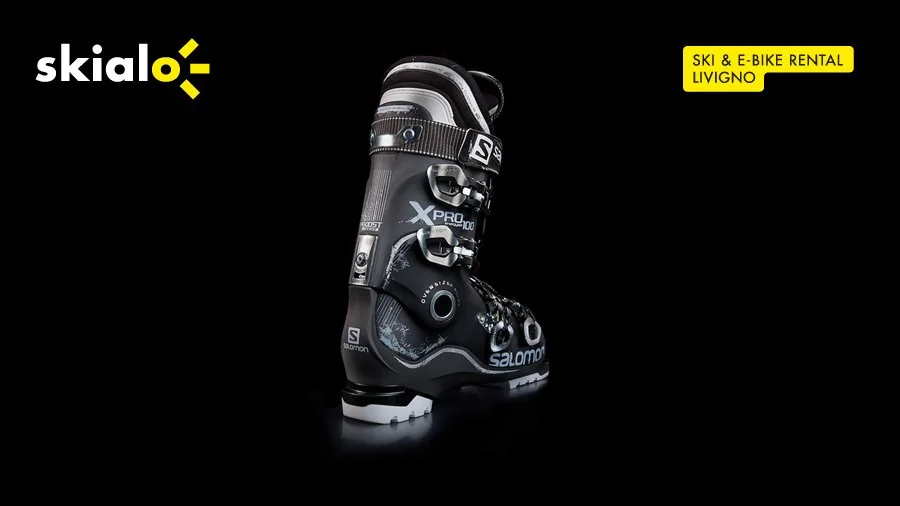
Beginner models are softer and more comfortable and forgive mistakes better. Those for experts wrap the foot more tightly and are stiffer. A boot too hard for your ability locks your ankle and takes away feeling: with a flex that is too high, a beginner improves more slowly.
Start with the Mondopoint size that matches your foot length. Put the boot on and close the buckles at the first level: if it already feels tight, you probably need a model with a wider profile. In the cold your foot shrinks and the plastic stiffens, so on the slopes you will close the buckles further.
Keep the buckles like that and check the length. Standing up, your toes should brush the front without pressure. When you bend your knees forward, you should no longer feel the front at all. Repeat the movement a few times to be sure.
Last check: close the buckles properly. Your heel must stay put as you flex your knees, and the ball of your foot must be held firmly, because precision in steering the ski comes from the front of the foot. Turning your foot sideways shows whether there is too much room.
If you are starting out, rent. Trying different models on the slopes tells you which boot suits your foot, and only then does it make sense to think about buying.
For specific problems such as bunions or sore ankle bones, there are models with a heat-mouldable liner. It is warmed with a dedicated machine, then you put the boot on and the liner takes the shape of your foot as it cools.
Remember that every small discomfort in the shop can turn into misery on the slopes. You can try boots on without any rush at our points in Doss, San Rocco and Carosello. If you book online you can add them to your ski set with 20% off the list price, and we will adjust them together when you collect them.
Book online and save 20% straight away.
Lifts run from 28 November 2026 to 2 May 2027: season dates, ski pass price periods and what to expect at the start and end of winter.
Read more
How much a ski pass costs in Livigno in 2026/27, the types available, where to buy one and the offers for children, families and groups.
Read more
How Skipass Free works in Livigno in 2026/27: the two valid periods, the minimum nights in hotels and apartments, and the mistake that costs you the offer.
Read more